Online Jewelry Training Classes for Metalsmiths

A step by step manual of how to take your Cavallin rolling mill apart, service it, put it back together again and then alignment of the rollers.
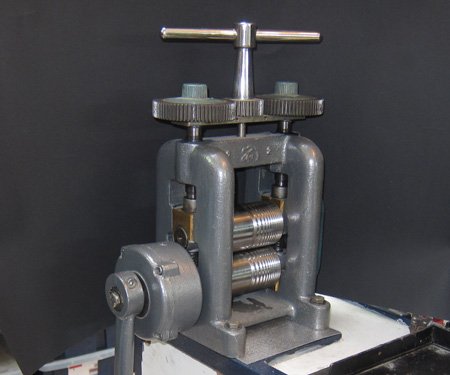
Something was making my Cavallin rolling mill difficult to turn. The handle wouldn't fall down when you let it go. It was as if a bush was binding, so I decided to service the roller.

This roller has a planetary gear system that gives a 4:1 ratio. In other words, you turn the handle and the roller turns once. After I took the handle off, the box slipped off quite easily.

This is what it looks like in-situ.

It was the first thing I took apart. Three circlips hold the planetary gears in place.

Definite wear against the shaft holder.

And wear on the gear sides.

Here was the problem. I have no idea why the shafts worked themselves loose.

Two had moved forward and were rubbing against the box cover.
Also the gear was binding at the discoloured area.
So I used a brass mallet and tapped them back down flush with the back and then the planetary gears worked smoothly again. If it happens again I'll tack weld them from the back.

Once that problem was solved I took the rest of the roller apart.
First I screw out the height adjustment gears after I take the plastic gauge indicator disks with numbers on, off.

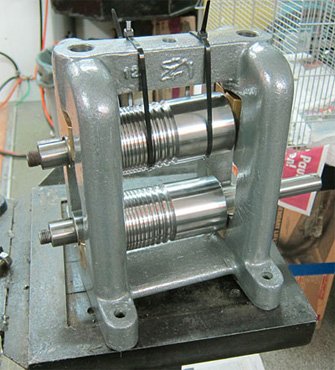
Here's a side view.

Now remove the rollers.

There are two steel pressure blocks that have to be lifted up and removed.

This picture was from an earlier time I serviced the rollers.
One has to use a small flywheel puller to remove the gears, but it is not actually necessary to remove them whilst the rollers are still in the frame.
The rollers can actually be removed from the frame and the gears can be removed afterwards.
Much easier.
I have no idea why the gears are so tight on the shaft --maybe it's only my roller.

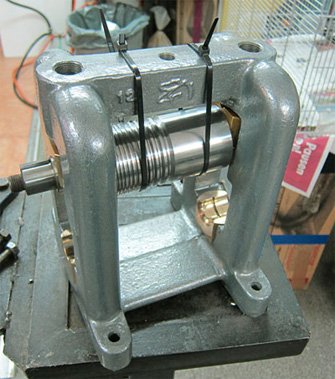
Anyway the next step is to raise the top roller as high as you can and then use some cable ties to hold it there.
Then the springs and bushing covers can be removed.
Once they are removed, the bottom roller can be slipped out of the frame and then the top roller can also be removed.

Once everything is removed, the frame can be cleaned and repainted.

And the various components can be cleaned in turpentine.

I mounted the rollers in my baby lathe and sanded them down with 1200 grit wet and dry sand paper.

I used a buff stick to clean and smooth the square grooves

I sanded the bronze bushes down and polished them on my polishing machine.

The painted frame, handle and box.

The entire roller cleaned and ready for re-assembly.

The drive gears are marked E and EE to make certain that they go back in the correct order. As in the two E gears and the EE gears are also partners.

First the bushes are fitted back to the frame.
Then the top roller is slipped into the frame and hung in place with some cable ties.
Then the bottom roller is slipped into the frame.

Multi-purpose grease is liberally applied to all the bearing surfaces and the two covers and the springs are fitted.

Then the cable ties are cut and the top roller is lowered onto the covers and springs.

The steel pressure blocks are greased.

The bronze part is also greased.
The little lug goes into the hole in the top of the bronze bush.

Like this.
Now the adjustment handles are screwed in until they touch the steel pressure blocks.

The gearbox is re-assembled with lots of grease.

The gears are tapped back onto the shaft keeping in mind E goes with E.

Finished.

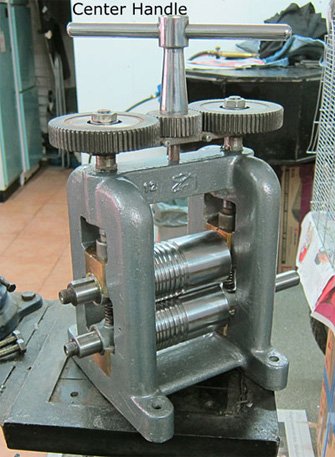
Aligning the roller
The center handle is removed and each roller is turned independently down until there is the thinnest strip of light showing through the top and bottom roller surfaces.
Once the light is parallel the rollers are aligned.
The center adjusting handle is then placed in position.
Here is a video showing how Light Alignment of a Jewelers Rolling Mill is done.
Click the link to receive your free PDF version of this jewelry tools tutorial on Servicing a Cavalling Rolling Mill, which will be emailed to you within 4 - 12 hours.
or select other projects from Jewelry Making Tutorials List
If you have any questions or wish to be notified of any new tutorials that are posted, email me.
This content is the intellectual property of Hans Meevis. More information on our Copyright and Privacy Policy


