Online Jewelry Training Classes for Metalsmiths

This project explores the method of cold joining different metals together with invisible rivets into a three toned ring.
This free tutorial follows the same format as all my other free and premium tutorials. This gives you a good insight into the technical teaching methodology.


First I cut out the basic shapes and file them roughly round.
They will all be filed more accurately once everything is riveted together.
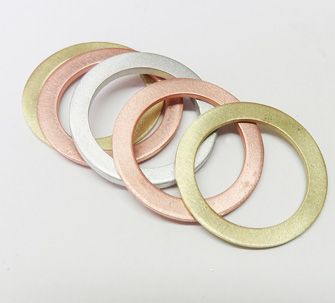

So basically I have made 5 round washers.
The red and gold colored ones are 1 mm thick and the silver one is 2 mm thick.
This is a personal preference-- they can be any thickness you desire.
Because there is still a lot of filing to be done, both on the inside and outside of the ring, I generally make the rings two sizes smaller than the final size needed.
The riveting process is never absolutely accurate so two sizes allows for enough leeway to file the ring up to the correct size.


The first thing to do is to 'register' the rings.
So I mark and center punch each ring in the same place.


Then I drill a 1 mm hole in each of them.


Then it is time to make the eight rivets that will hold these ring together.
I start by using 1 mm annealed wire.


To make the rivets, I use the Rivet Maker Tool Kit, that I have developed to help make rivets that are all equal and identical in shape.
Here is a link with more information on the Rivet Maker Tool
However, this ring can be completed without the use of Rivet Tool Maker by making the rivets free hand.


I cut off a piece of the wire and insert it into the 1 mm rivet forming die.
This die is designed to make a rivet that has a small head for rivets that will be filed down flush with the parent material.


Using the height gauge that is supplied with the rivet maker, I select the 1 mm height.


The height gauge ensures that all the rivets will be cut to the same height so that the rivet heads will all be the same size.


I prefer to just stroke a fine needle file across the top to make everything flat and neat before I start forming the head.


I use a 60 gram hammer as shown that has both faces polished.
If the face is rough, the marks on the hammer will be transferred to the hammered piece, and then have to be removed.
Whilst the rivets are small and easily finished off, it is still good practice to have smooth faces because of the old saying:
“If you don't want marks on metal, don't put theme there in the first place.”


Here the rivet as been tapped down to spread the head out evenly.
It is important to use a lot of cross taps, rather than a few hard hits.
Cross taps meaning tap 12 o clock, then six o clock then 9, then 3 and so on all around until the head settles down nice and evenly.


The finished rivet.
The rivet maker is designed to make rivets that can be completely invisible when they are filed and sanded down.
The expanded area section forces itself into the hole and the fit becomes so tight that absolutely no space is left.
This caused the rivet to become virtually invisible when it is filed flush.


All eight rivets are made and all the holes are drilled.


Here is a closeup of a 1 mm hole.
Note that the edges are not chamfered.
So that means that when the rivet's 'expanded' zone is forced into the hole it becomes a very tight fit indeed.
If the final rivet will stand proud, say as in a decorative rivet, the hole would be chamfered with a ball frazer so that the top sits flush on the surface.


Here is a posed picture showing the rivet head and the expanded area about to be forced into the hole.


All the rings are then located with the rivet into the register hole.


Then I use the rivet makers' height gauge to trim the rivet off to the correct height.
When I say the correct height, that means what is most suitable to the project.
With this project, the first height I cut was 1 mm , the first tier of the height gauge.
But after peening it over, I thought a little more metal in the head would be easier to tap, so I changed the subsequent rivets to the second tier (1.6 mm).

With some projects, the rivet maker's flat die would be used and the rivet would be tapped over with the flattened head resting on the flat pin.
But because the ring is already flat, I just laid the ring on my steel block, and then peened the rivet over.


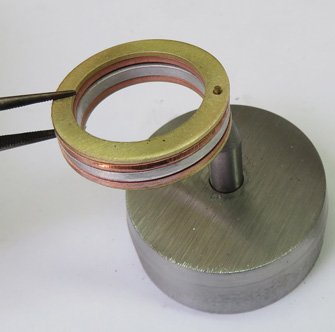
Here the first 'register' rivet has been peened over, and the five rings are now locked into position.


The rings are carefully aligned up so that they are all in line.
Now the second hole is drilled.
My Drill-Str8 Mini Bench Drill Press that turns your flex shaft into a drill press on your workbench that is especially designed
for easy accurate drilling.
I use the Drill-Str8 to drill the hole through all the rings at once.
The Drill-Str8 ensures the the hole is perfectly at 90°.
Click here for more info on the Drill-Str8 Mini Drill Press.


Then I use the rivets maker's height gauge to trim the rivet off.
Note I am using the second tier, as mentioned before.

Once the first two rivets are finished, the next two holes can be drilled and riveted.
Note that even though the five rings were all of an identical size, they still managed to shift slightly out of alignment.
This is the reason I make the rings two sizes smaller, so that there is enough metal to file everything smooth on the inside and outside.


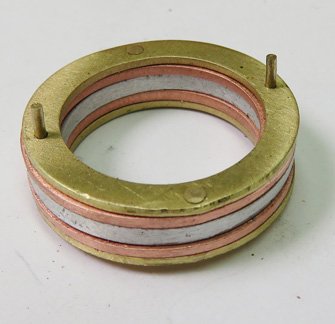
I drill the next four holes and rivet as before..


As mentioned, I used the 1,6 mm height gauge for seven of the rivets.
One can clearly see the different results between the two different heights.


All eight rivets are peened over and the ring is ready to be filed and sanded down as per normal.
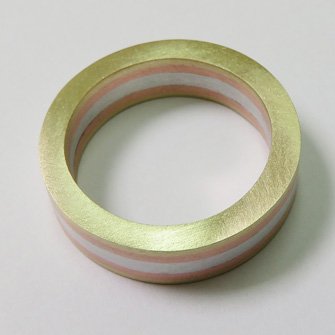

After filing and sanding, the rivets are effectively invisible.


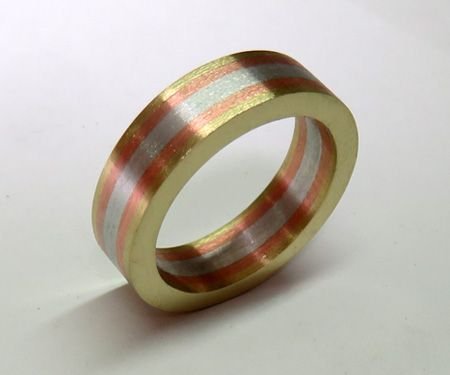
The finished ring.
I have left the ring with a satin finish, because it set the color contrast of the different metals off nicely.
Click the link to receive your free PDF version of making a Rivet Three Tone Ring Tutorial which will be emailed to you within 4 - 12 hours.
or select other projects from Jewelry Making Tutorials List
The Rivet Maker Tool helps you make perfect jewelry rivets fast with precision and uniformity.
If you have any questions or wish to be notified of any new tutorials that are posted, email me.
This content is the intellectual property of Hans Meevis. More information on our Copyright and Privacy Policy


