Online Jewelry Training Classes for Metalsmiths

In some cases you want to make your own earring hooks like for instance when your creation is labelled handmade.
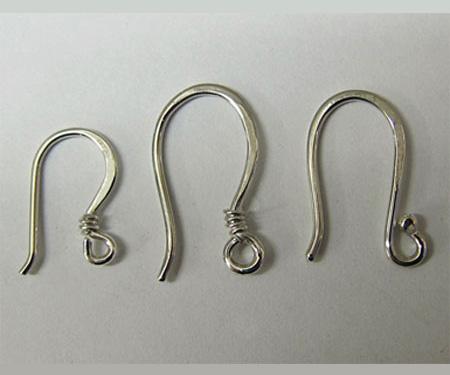
This free tutorial on how to make ear wire hooks is going to have a lot of 'about ' lengths. That is because earring hooks come in many different sizes since ears come in many different sizes. The holes that are pierced into the lobes of ears are pierced in many different positions.
I am going to make two slightly different hooks at the same time from wire stock I made.
This free tutorial follows the same format as all my other free and premium tutorials. This gives you a good insight into the technical teaching methodology.
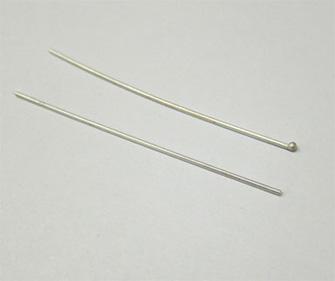
I start with two pieces of wire.
The wire can be anything from 0.7 mm to 1mm thick.
Any thicker and the hook will be difficult to insert and any thinner and the earring will soon be uncomfortable to wear.
A good rule of thumb is that an earring should not weigh more than 10 grams per earring.
Anything more and it will become uncomfortable after a short period of time.

On the one wire, a small ball, about 1.5 mm in diameter is formed using a reducing flame with the wire held vertically.
The tip of the wire is dipped into flux before the flame is applied.
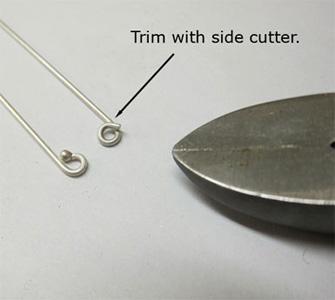
A small circle is bent on a small double round pair of pliers.
The wire with the ball is all that is needed at this stage.
The other wire is trimmed with a flush side cutter.

The trimmed wire is bent again in the shape shown in the picture, using double round or the needle nosed pair of pliers
Note how the pair of pliers holds the hook.

The hooks are then bent into this shape.
The hook with the ball is effectively finished because all that remains is for it to be hammered, trimmed off and polished.
The hook on the left needs a bit more decorative work.
The hooks should be in between 10 mm and 15 mm in height.

I flatten the back part of the hooks with a small hammer.
The hammer's face is polished so that it transfers a polished surface to the wire as it is being hammered.
There are two reasons I take this extra effort.
One, it work hardens the back, making the hook less prone to bend open.
And the second reason is that it just plain looks nice and professional.
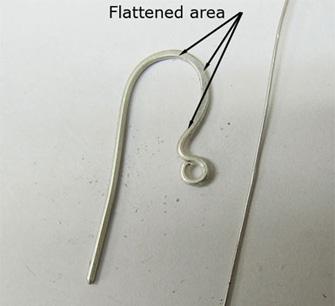
The hook must not be flattened too much, otherwise it becomes to sharp and can become uncomfortable to wear.
The design in the picture shows a design that is also often used 'as is'.
A piece of annealed wire that is 0.05 mm thick is used.
I twist the wire around the bottom as shown, about 3 or 4 turns.
This is purely decorative and it gives a nice handmade feel.
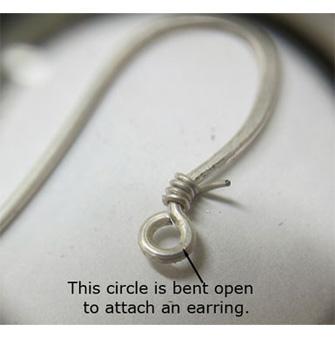
When attaching an earring to the hook, the rear circle is bent open with a small pair of pliers, then the earring is inserted and the circle is bent closed again.

When I make hooks, I always make more than needed for stock.
On the left silver and on the right gold.
Making your own ear wire hooks give you the flexibility to cater to all different ear sizes and flattering lengths for your handmade earrings.
or select other projects from Jewelry Making Tutorials List
If you have any questions or wish to be notified of any new tutorials that are posted, email me.

This content is the intellectual property of Hans Meevis. More information on our Copyright and Privacy Policy


